Deploy Kunai
This guide outlines the process of deploying Kunai within a management cluster.
Deployment Methods
Kunai offers two primary deployment methods:
1. Sylva Unit Deployment (Recommended)
The simplest way to deploy Kunai is as a Sylva unit. Add the following to your Sylva configuration:
units:
  kunai:
    enabled: true
2. Scripted Deployment
For more advanced scenarios or to deploy multiple Kunai instances (e.g., separate development and production instances), use the provided deployment script. This script deploys two instances:
- prod: Tracks production releases (tagged releases on the
mainbranch). - dev: Tracks development releases (commits on the
devbranch).
Steps for scripted deployment:
-
Clone the Kunai repository:
git clone https://gitlab.com/sylva-projects/sylva-elements/kunai.git cd kunai -
Navigate to the
hacksdirectory:cd hacks -
Run the deployment script:
./deploy-kunai.sh
Important Configuration Parameters:
Before running the script, ensure the following environment variables are set correctly:
KUBECONFIG: Path to your kubeconfig file for the target cluster.HTTPS_PROXY: (Optional) Configure if your environment requires an HTTPS proxy. Leave empty if not needed.NO_PROXY: (Optional) Specify hosts to exclude from proxying. Leave empty if not needed.
Vault Configuration
Note
A production-ready Vault configuration is currently under development. For production deployments, please refer to this issue for updates and to contribute your feedback.
Kunai integrates with HashiCorp Vault deployed in the targeted management cluster. The following script sets up a Vault configuration suitable for development, demo, and testing environments:
-
Navigate to the
hacksdirectory (if not already there):cd hacks -
Run the Vault configuration script:
./create-vault-kunai-role.sh
This script configures the following within Vault:
- A secrets engine named
kunai-platform-secrets. - An OIDC auth engine with a role named
kunaigranting read and write access to the secrets engine. - A Kubernetes auth engine with read access to the secrets engine.
- A
clusterSecretStoreusing the Kubernetes auth method namedkunai-credentials.
Accessing Secrets
You can access secrets stored in Vault's kunai-platform-secrets engine using ExternalSecrets. Here's an example:
apiVersion: external-secrets.io/v1beta1
kind: ExternalSecret
meta
  name: cluster-a-sylva-units-values-specific
spec:
  refreshInterval: 1h
  secretStoreRef:
    kind: ClusterSecretStore
    name: kunai-credentials
  target:
    name: cluster-a-sylva-units-values-specific
    template:
      engineVersion: v2

        secrets: "\{{ .clientSecret }}"

    - secretKey: clientSecret
      remoteRef:
        key: path-to-your-secret
        property: credentials
Public templates will utilize this method. Adapt the template to your specific security requirements as needed.
Targeting Management Clusters
Kunai can be deployed in one cluster and target a different management cluster. If the target cluster is different, ensure :
- You provide the correct cluster certificate when registering Git repositories within Kunai.
- Your target management cluster has vault configured
- Your target management cluster has a ClusterSecretStore
Access Kunai authenticated using swagger
Use swagger to access to Kunai APIs.
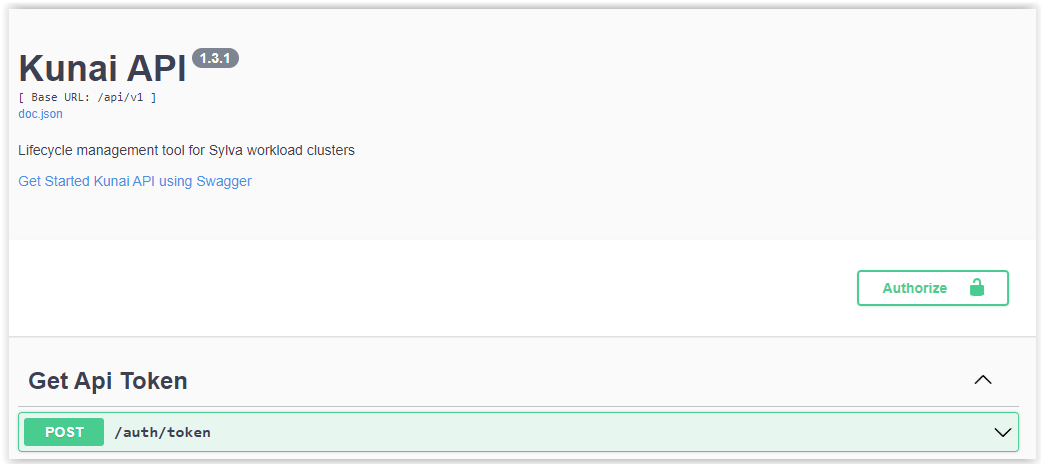
Get token
POST /auth/tokenTry it out-
Specify a user and its password :
{ "password": "user-password", "username": "user-name" } -
Execute - Copy the token value delivered by Kunai API.
Apply token to all request
-
Authorize
-
Paste the token value into the bearerAuth field.
AuthorizeClose
You are now authenticated to run Kunai API requests.

Run Kunai API requests as usual
- GET /gitRepositories
Try it outExecute
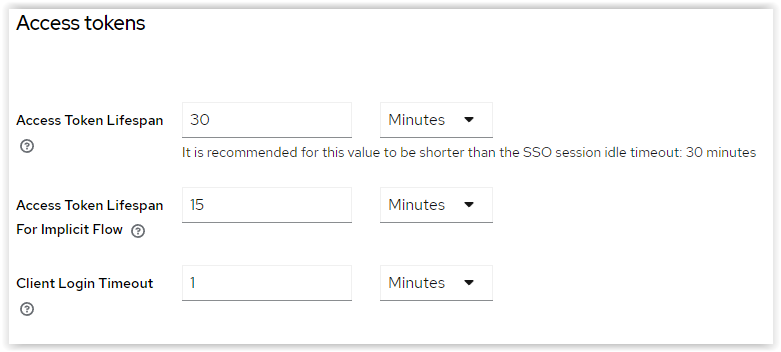
Increase the token validity
In order to increase the token validity used in the API you can change it in the Keycloak parameter as following :
Username or email : admin
Password : XXXXXX
Keycloak : sylva
Realm settings > Tokens
Access tokens
  Access Token Lifespan : 30 Minutes